Can your kid sit up and hold their head steady for the whole ride? If your answer is anything less than a definitive "yes," stop what you’re doing and put the bike back in the garage. I’ve spent nine years in the back of a busy bike shop, fixing stripped rack bolts, tightening loose mounts, and watching parents try to shove infant seats into incompatible frames. Believe me, the road is unforgiving, and vibration is a silent enemy.
I keep a tiny, weathered notebook in my back pocket—the kind with the frayed edges. Inside, it’s not phone numbers or grocery lists. It’s a list of "things that rattled loose mid-ride" over the last decade. Loose quick-releases, half-threaded rack bolts, and improperly tightened helmet straps. If you don't take your equipment seriously, you’re just a pothole away from a bad afternoon. Let’s talk about how to get your family moving safely, without the guesswork.
Beyond "When They Are Ready": Identifying Developmental Readiness
I’m tired of hearing parenting blogs say, "Wait until they are ready." What does that even mean? Let’s get specific. Your child is not ready for a bike seat just because they hit a certain age. Age is a number; physics doesn't care about your baby’s birthday.
You are looking for three distinct physical milestones before you even consider a "first bike ride with baby":
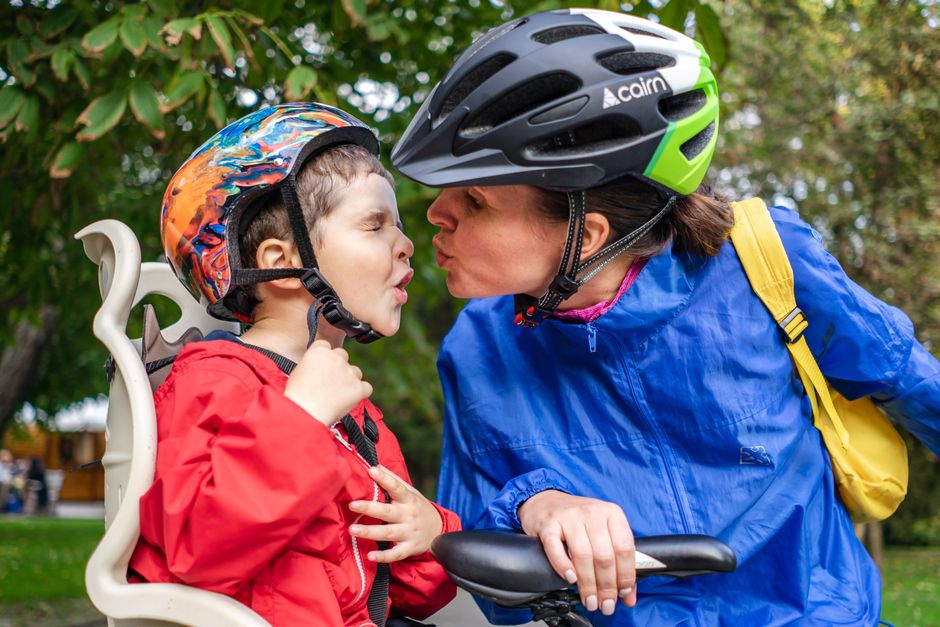
- Independent Sitting Stability: The child must be able to sit upright, unsupported, for at least 15-20 minutes without slouching to one side. If they slump when they get tired, they are not ready. Neck Strength (The Helmet Test): Can they hold their head upright while wearing a helmet? A standard infant/toddler helmet adds a significant amount of weight to their head. If they can’t support the helmet’s weight, their head will bob, causing neck strain and potential injury during sudden stops. Core Tone: Can they maintain a neutral spine while you navigate over minor bumps? If they lack the core control to compensate for your movement, you are setting them up for a jarring experience.
Choosing Your Vessel: Front Seats, Rear Seats, and Trailers
In the shop, I used to see parents choose a seat based on aesthetics. Don’t do that. Choose based on your bike’s geometry and your specific riding style. Here is how I break it down for the families I help:
The Comparison Table
Type Pros Cons Best For Front-Mounted Seat Center of gravity; you can see them; more interaction. Limits your pedaling space (knees hit the seat); limited weight capacity. Younger toddlers on casual, flat, urban commutes. Rear-Mounted Seat Higher weight limit; better longevity; fits most bikes. Changes handling (more "top-heavy" feel); blocks access to rear rack space. Daily commuting; older toddlers; smooth path biking. Bike Trailer Safest in terms of stability; weather protection; extra storage. Low to the ground (harder for cars to see); heavy; takes up garage space. Longer rides, errands, and families prioritizing stability over speed.If you choose a rear seat, do a rear rack compatibility check first. Does your frame have the correct eyelets? If you are using a clamp-on adapter, have you tightened it to the manufacturer’s torque spec? I’ve seen cheap clamp-on racks slip and rotate into the wheel—that’s a nightmare you don’t want to experience.
The Helmet: Eyebrows, Ears, and Eyes
Nothing grinds my gears more than seeing a parent riding with their child’s helmet tilted back like a baseball cap. If the helmet isn't covering the forehead, it isn't doing its job. It’s useless decoration at that point.
When you perform a bike helmet fit check, keep these rules in mind:
The Eyebrow Rule: The front of the helmet should sit roughly two fingers’ width above the eyebrows. If it’s higher, it’s going to hit the pavement before the forehead does in an impact. The V-Shape: The straps should form a perfect "V" directly under the ears. If the slider is loose and sitting near the jaw, the helmet will slide off in a crash. The Mouth Test: Tighten the chin strap until you can only fit one or two fingers between the strap and the chin. Now, ask the child to open their mouth wide. The helmet should pull down slightly on their head. If it doesn’t move, the strap is too loose.Don't just tighten baby bike seat age it and leave it. Check it before every single ride. Straps stretch, and kids are notorious for fiddling with them until they’re loose again.
The Mechanical Checklist: Why You Need a Test Ride
I cannot stress this enough: Never put your child in a bike seat for the first time on a public road or a long ride. You must do a test ride without the child. This is a non-negotiable step.
The Test Ride Protocol:
- Load the Weight: Put a bag of sand or something equivalent to your child’s weight in the seat to mimic the load. Check for Interference: Do your heels hit the seat? Does the bike handle drastically differently during a slow, sharp turn? The Rattle Check: Ride over a few bumps. Is there any clicking, clanking, or shifting? If you hear a noise, find the source and fix it. That noise is the sound of a bolt loosening.
When you are checking your rear rack compatibility, look for the "bounce." A rack that isn't properly bolted to the seat stays will oscillate under load. This creates a rhythmic, pendulum-like effect that makes the bike feel sluggish and unpredictable. Tighten your hardware, and use a drop of blue Loctite on the threads if you’re concerned about long-term vibration.
Planning Your First "Short Ride"
Your first short ride plan should be boring. Seriously. I want you to aim for "painfully uneventful."
Go to a paved, wide, smooth path with absolutely zero car traffic. I’m talking about a flat park path or a closed cul-de-sac. Do not try to commute in traffic on day one. Your goal is for the child to get used to the sensation of the wind, the movement of the bike, and the feeling of wearing a helmet.
Keep the ride to 10 minutes maximum. When you get back, check the notebook. Did the seat shift? Did the helmet slide? Ask yourself:
- Did I have to adjust my pedaling style significantly? Did the child look comfortable, or were they fighting the harness? Is the mounting hardware showing any signs of stress or movement?
A Final Word from the Bench
I’ve seen parents ignore these steps for years, and most of the time, they get lucky. But "getting lucky" isn't a safety strategy. In my shop, I operate on the assumption that if it *can* go wrong, it *will* go wrong when you're three miles from home with a crying toddler.
Take the time to do the bike helmet fit check properly. Run the rear rack compatibility check twice. And please, for the love of all things, start with a smooth path biking session that lasts no longer than a trip to the mailbox. When you build the foundation right, the miles ahead become a joy rather than a stress test for your nerves and your hardware. Now, go check those bolts—the road is calling.